Honda D Series Forum banner

DIY Oil pump shimming and porting.

1 reading
65K views 92 replies 31 participants last post by  racer76j  
#1 · (Edited)
Shimming the oil pump

First off, i allways inspect the oil pump before i do any modifications If the oil pump is bad, its not worth doing all that work to find that out in the end. Sorry for the crappy pics guys.

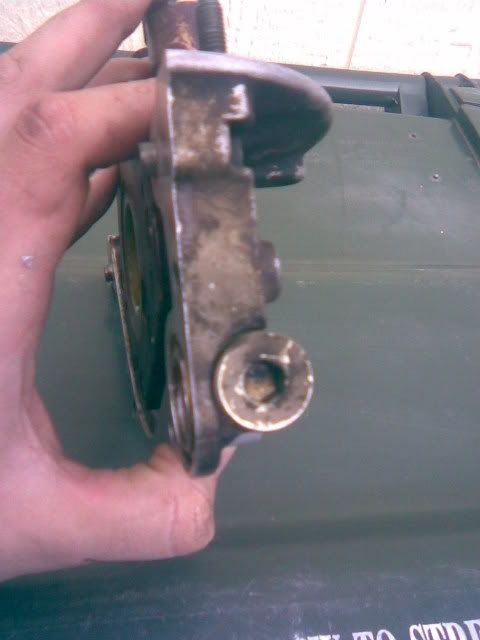
So first you take off the Philips headed bolts that hold down the rotor cover.Im using my impact driver to remove them, its the BEST! 35 dollars ive ever spent.
Image


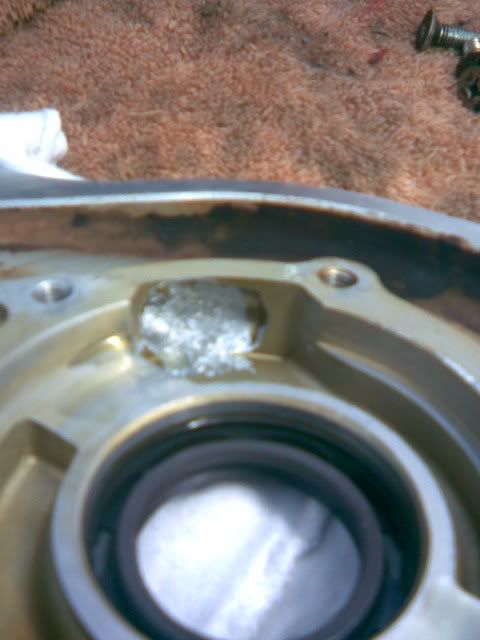
After that you measure the rotors per honda spec. this one was on the tighter side of spec and everything looked good.
Image

Image


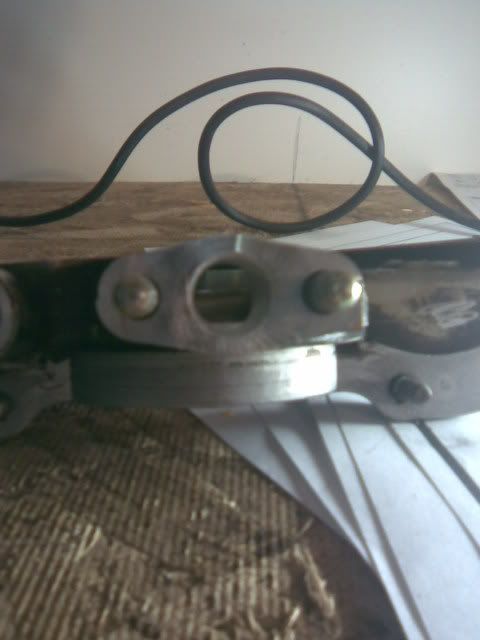
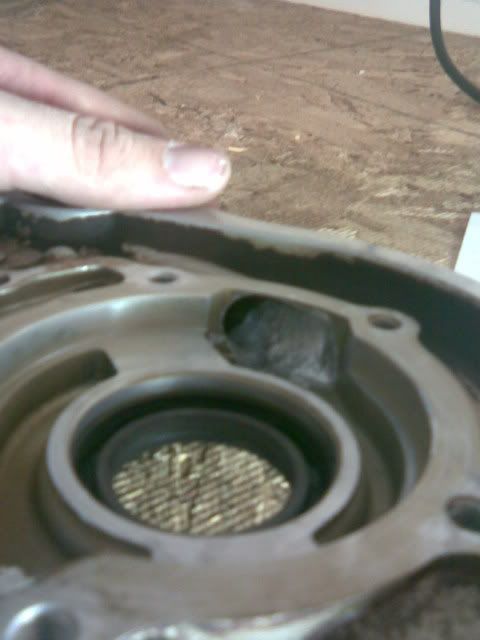
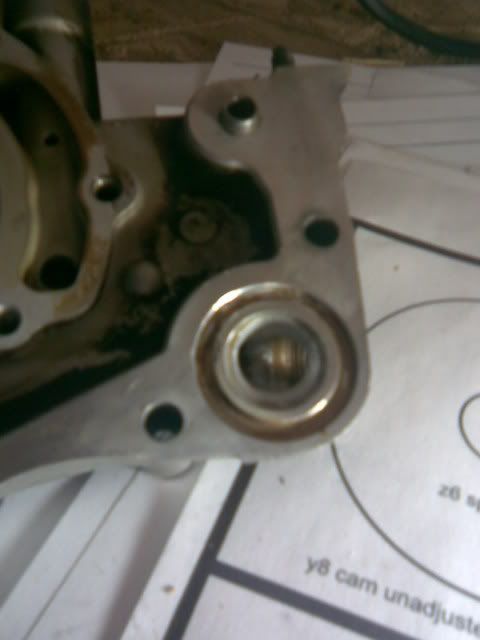
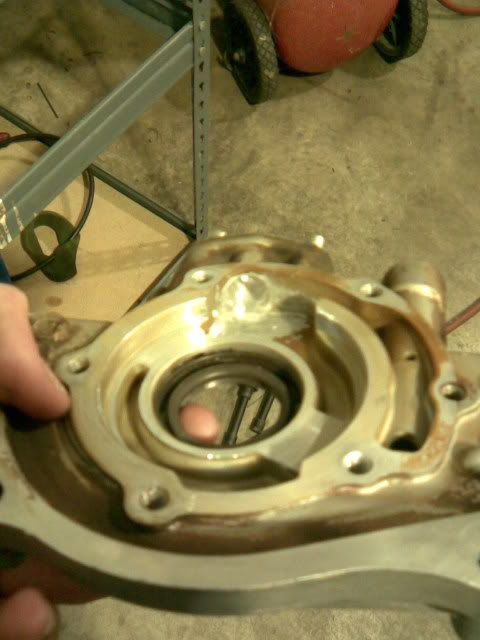
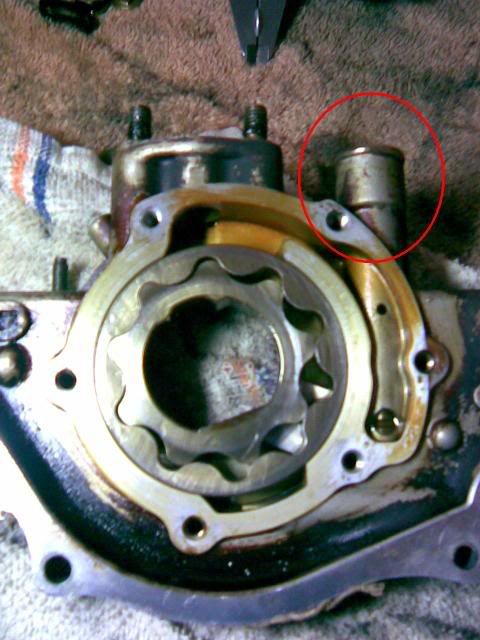
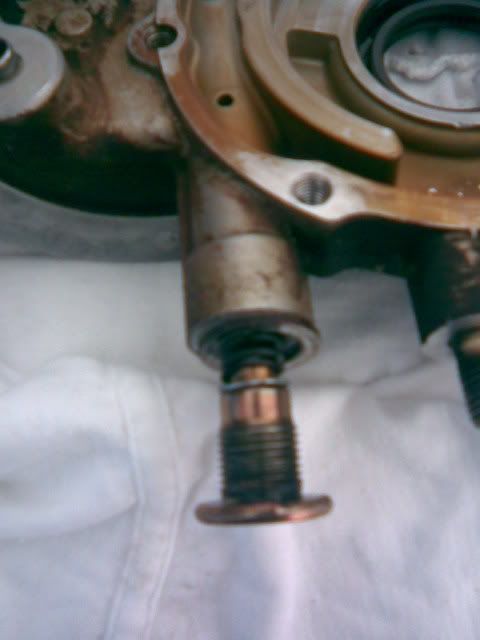
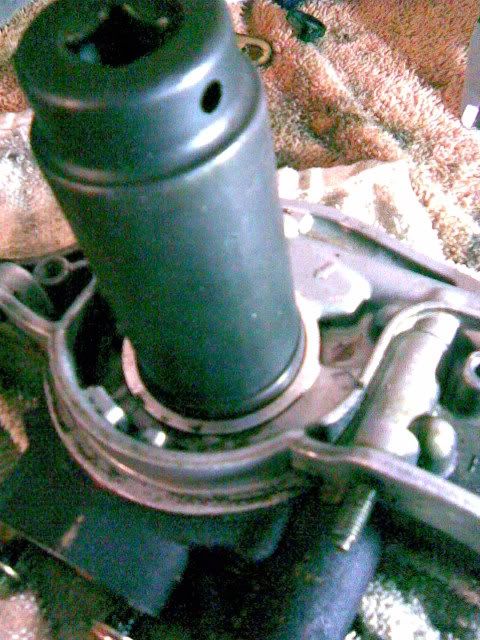
Next you remove the hex head bolt on top of the oil pump next to the pickup tube inlet. this is where the pressure bleed off valve is when the pressure gets to a certain point, this piston lifts and limits the ammount of pressure that is produced. Be carefull when removing this, the spring is quite strong.
Image


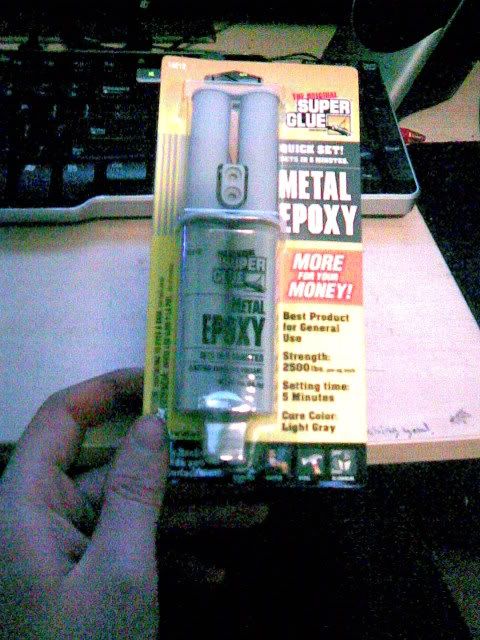
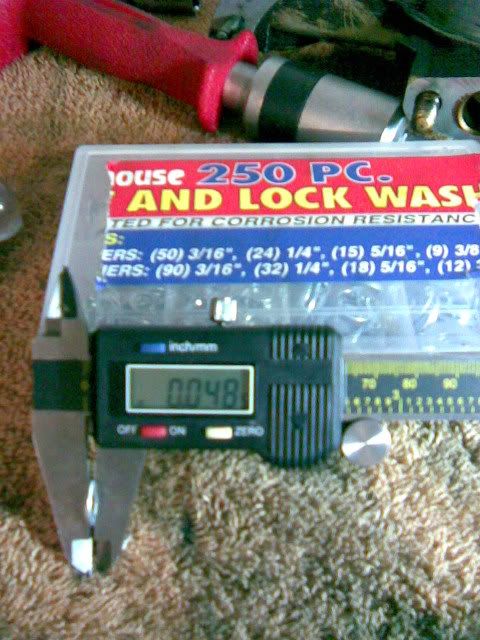
Next you want to get your shim, with an ID of .30 and OD that matches the diameter of the piston (i didnt measure sorry). I found a washer that the OD was correct, but the ID was too small, and the thickness was .048. The thickness of the shim you are looking for is to be between .025 - .035 thousanths, that will give you an oil pressure of about 80-100 psi at 7000 rpm's (this is even more important on turbo and high rpm engines).

I got the washer out of a harbor freight multi pack thats under 5 dollars its under the caliper in the picture.
Image


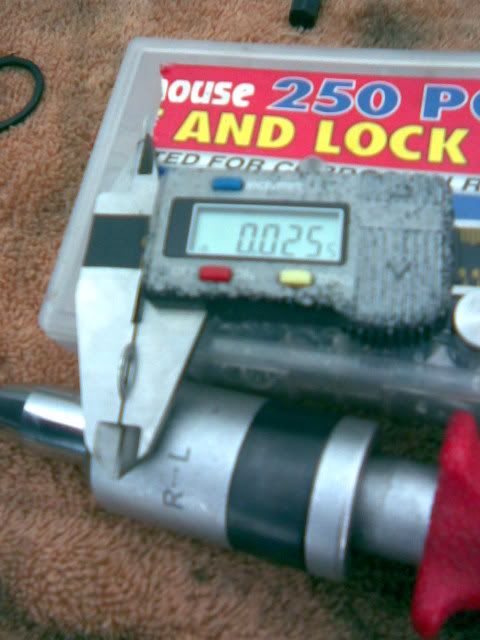
Next i bored out the ID of the washer with my die grinder. Then since its so small i couldnt use a grinder and hold it, because then it wouldnt be flat. So i took the end of one of my screwdrivers that im going to return to sears and ground the washer down on my concrete floor. Slowly it took metal off until i got down to my desired thickness. (As seen in the second picture, the differences between the way they come and the finished product).
Image

Image


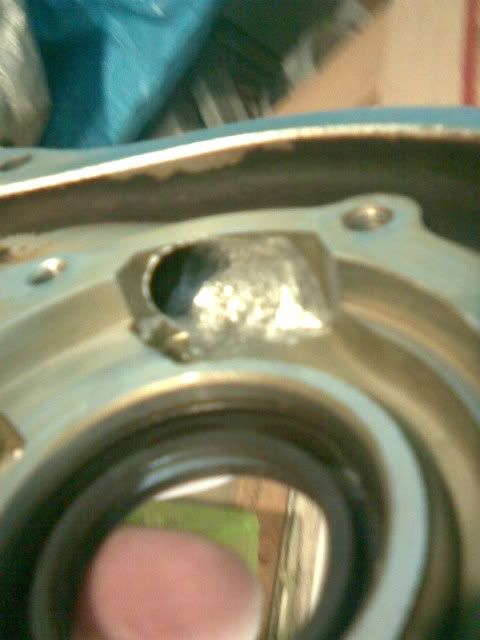
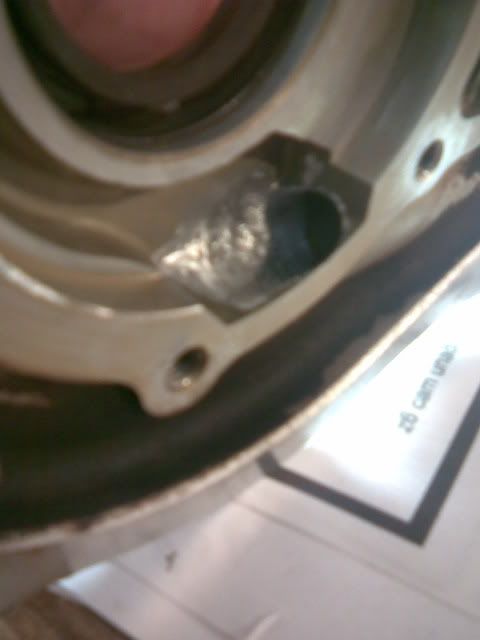
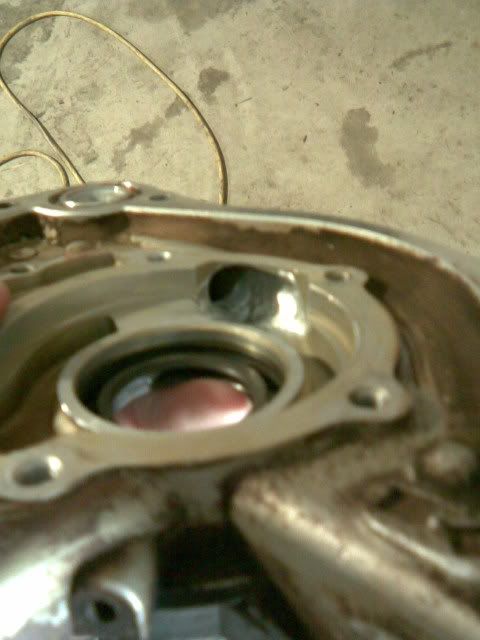
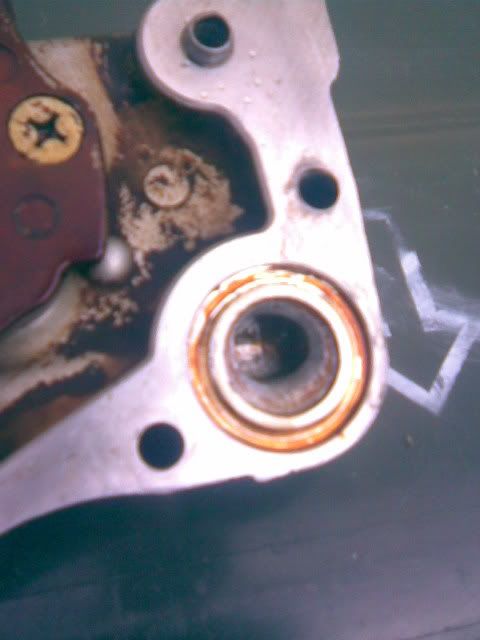
Before you reinstall make sure the shim sits flat and level on the bolt, then clean the piston and the passage out, then coat everything in engine oil. (If your going to be porting as well, leave this out for now, it will need to be cleaned).
Image


And thats it!
 
#2 · (Edited)
Oilpump porting

If you allready shimmed the oil pump, then your ready to port it, take the rotors out and set them aside. Next take the hex plug out on the bottom of the pump.
Image


Now to port i used a carbide bit that was 25$ at tacoma screw, i also bought some cheap ass HF ones but this takes the cake on durability. Be carefull though, if you have never ported before with a carbide bit, it can easily take huge chunks out of alluminum. here is the bit i used.
Image


Next you will want to enlarge the opening on the output passage, you can go larger but i found this to be perfect for what im looking for.
Image


Then i enlarged the pickup passage a little bit, since the pickup tube itself isnt nearly as large as the gasket, i didnt see any reason to enlarge it that far.
Image


And finally the inside port, this one is tricky and you have to be carefull you dont want to knick any of the surfaces that the rotors ride on. I took a fair amount out of here I found that if you lubricate where your grinding it doesnt jump as much and helps the bit last longer.
Image


Thats it on the porting, be sure to clean everything very very well! I used a degreaser cleaned the inside and passages out, then washed it with water twice, and then blew it out with compressed air to make sure that no shavings were left behind. After that, reinstall the rotors with oil on the top and bottoms of them to lubricate them. put the cover back on, and install the pressure valve and the hex bolt on the bottom. And your done! congrats you just ported and shimmed your oil pump.

Front seal replacement

I replaced the front seal while i was doing this so i thought i minds well show you how to do that too, I drove the old seal out with a screwdriver and a hammer. To install it i put the new seal in level as far as i can into the hole, and then put your 32mm axel nut socket over the seal, (It fits perfectly) then i drove it down evenly with a rubber mallet. Easy as that.
Image

Image
 
#12 · (Edited)
Hmm, how could I say this as politely as possible, and with all respect to the OP.
Sorry, but I almost neg-repped you.. There's many reasons for this;

-This topic has already covered multiple times, and not at all worst at Endyn's site.
-Oil pressure is high enough at stock. Additional pressure only increases parasitic losses and strain to components. Increase the flow volume for better lubrication!
-You keep talking about enlarging. That's completely wrong point. You don't want big ports, you want ports flowing smoothly with big radiuses. Yes, additional volume on some places is helpful, but we'd like to have such of passages at close to constant diameter/area, and changes should happen with smooth, shallow tapers
-Shapes of ported ports are wrong.. I see lots of abrupt changes in shapes.

One more time for the OP, don't take this as personal or any kind of attack or anything like that! My purpose is purely to help people, not trying to be an asshole. Other than those points I mentioned, that was a great DIY-post :TU: :)
 
#13 ·
Rushi, how does a turbo feed line, or in the case of a LS/VTEC setup effect the oil pressure AFTER the relief valve?

Relief spring MIGHT be seeing 85-90 psi, but what is the mains seeing after the bleeding effect?

Yeah, no one can answer, not even Larry.

10 psi per 1000 rpms, simple, works.
 
#16 ·
you know i was just explained this by my builder casue i asked him the exact same thing about shimming my oil pump.

he explained volume is what you want not PSI

take a 1/4 inch tube with 50 psi you can put your finger over it and stop the flow very easily

now take a 1 inch tube with 10 psi and you cant stop the flow

so its the volume you need not preassure.

i hope i stated that right
 
#17 ·
Well since i know this oil pump is going to be going on a turbocharged engine, i shimmed the oil pump. (Because you loose oil pressure with the turbo) So where as it may usually be 80 or 90 at 7000 rpm's it will now be 70 or 80 at 7000 rpm's (assuming that 10psi is the ammount of drop).

Taking rushi's words into consideration i went back over the oil pump, i borrowed my step fathers dremel wich is far superior over the die grinder. I used a very very small high speed steel bit it worked very well especially in the tight corners and spaces.
Image


I also bought a roll of emery cloth from Harbor Freight.
Image


I proceeded to go over all of the ports again, smoothed them out and made them the same diameter through and through. The pickup line passage wasnt that bad, but i did alot of smoothing on it and cleaned up the begging of it a little bit so there were no sharp edges.
Image

Image


I then cleaned up the output passage as well, this one had a huge chunk on the side that i took out and smoothed everything up with.
Image

Image

Image


And then i smoothed out the final output passageway, it didnt look all that bad other than the diameter being a little off and wasnt smooth enough.
Image


I went over every port with that 120 grit emery cloth. it really cleaned everything up tell me what you guys think, ill keep it open in case you guys have any more suggestions.
 
#18 ·
Looks better :TU: I'd only add some more radius into the output passages' lower side at the pump/gear chamber. Then get some Devcon (it's so easy and cheap for you guys in the states..) and fix the outlet turn radius.

Or if you want to be extreme, block the outlet passage, install big AN fitting into the place of hex plug, use big external oil filter and route the oil remotely with big enough hoses and very gentle bends. That way you could eliminate a few sharp 90-degree turns 8)
 
#25 ·
Well i went ahead and used that epoxy, before i used it though i washed the area down with a degreaser first, and then a mix of acetone and the epoxy mix with a hard bristled brush. I then mixed up a batch thuroughly and put into the hole. Here is the outcome of the entire pump.
Image

Image

Image


That epoxy is great stuff and i would recommend it again :TU: and for under three dollars!? its a fucking steal.
 
#26 ·
i'm very concerned about the two part epoxy coming loose and contaminating your oil. what was the point of it? to smooth out the ports?


-Luke
 
#27 ·
The turn radius of the outlet passage was very sudden and sharp. So i bought that 2 part metal epoxy that is made for alluminum and metal. I washed the passage out with acetone very well (and since i had recently ported that area, only bare fresh aluminum was exposed). I then bathed the plug in acetone and wiped it off then installed it, Then i mixed up a batch of epoxy and threw it in there. Its really strong stuff and i couldnt pick it off with a screwdriver so im going to guess that oil pressure alone couldnt do that.
 
#28 ·
high pressure hot oil. underline it lol. if that bond isn't 100% perfect it WILL get underneath it. that's the bitch about high pressure hot oil haha it will get it's way into the damnest places.

i'm just vocalizing my concerns, i'd never run two part inside my engine. do i use jbweld hell yeah but i would never trust it enough to not let go on the inside of my engine.

-Luke
 
#33 ·
Thanks for the DIY, Cervan.

I have a couple of questions (to whomever can respond).

Should you be concerned about lining up the gears exactly how they were prior to removing them? It was supposedly an important step on an oil pump rebuild thread I came across. You would just draw a line with a marker across the intersection point of the two gears and the rest of the housing.

I found the hex plugs to be hard to remove by hand. With the pump off the engine I had to jam it in a vise protected by wood on both sides then I used a big hex key with an extention bar. I found it easier to at least loosen these plugs when the pump was still on the motor. How did you do it?

There seems to be sealant on the plug threads. I used Permatex Ultra Grey when reinstalling them. What did you use?
 
#34 · (Edited)
I havent heard of the "lining up" of the rotors requirement, i would think that both rotors are neutrally balanced, maybie it would be the wear factor? im not sure about that one.

As for the hex ill show you how to remove that real quick ill make a small video. EDIT: here is the video. http://s8.photobucket.com/albums/a2/Cervan/?action=view&current=Video001.flv

I found sealant on only one plug, the outlet "pressure" side plug that is on the outside of the crankcase, the relief spring i didnt see any. I used loctite blue on both plugs no sealant.
 
#39 · (Edited)
why even do this? who's having oil pressure problems with EF/EG pumps? I haven't had any issues with oil pressure at all since I've been turbocharged.

I def. wanna do something with my y8 pump though. I've heard too many bad things about those. there's no TSB on the y8 pumps. the only thing I can see different about the y8 pumps is that the input on the pump is a circle instead of an oval shape like the other pumps. I was thinking of boring out that hole to mimic the oval style pumps. then use a EF pickup and a slightly modified y8 pickup gasket.

impact driver at HF $7 ;-)
 
#40 ·
for high rpm and high power builds its a very good idea to do this, maybie not so much the shimming part, but the porting part is very important On turbocharged builds your going to have a 10psi drop in pressure across the board, so its a good idea to atleast shim it to bring it back up to stock pressures. The y8 pump has smaller diameter ports and the crankshaft is like the a6 crankshaft with only one oiling hole, the fourth rod and main are allways the first to spin because of this.
 
#41 ·
first off, cervan, I give you props for having the courage to even do a diy and post it up, good job:TU: But, dude, I cringed when I saw you grab that sledge hammer...lol I thought you were kidding, but then, wham! and then again, wham! I just saw in my minds eye that aluminum breaking right off....